Add Print Friendly Button Manually On New 2013 Blogger Interface
Easy 4 Steps To Add Print Button On 2013 New interface Blogger
Everyone Searching Easy way to put print button on blogger post. Here I am going share with you my research Now You can Manually add the PrintFriendly button to your blog in four easy steps. If you prefer a Fast Simpler way, I recommend To You Use This Way Use Blogger's Built-in Add widget tool For Printer.How To Add Print Button Manually In Blogger
Step 1: Get the PrintFriendly button code.
- Goto www.PrintFriendly.com/button.
- Select Blogger/Blogspot.
- Select your button style.
- Click Add Code directly to template.
- Copy the code in the text box that appears.
Step 2: Edit your blog's HTML template.
- Log into your blog dashboard.
- Click Template on the left navigation menu.
- Click Edit HMTL below your blog thumbnail.
*Dynamic Views templates doesn't allow editing your HTML. You'll need to use the classic Blogger/Blogspot Templates.
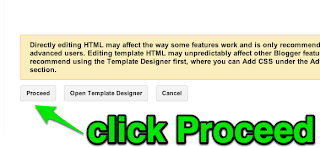
- Click Proceed on the warning message.
- An Editor will appear. Make sure to put a checkmark Expand Widget Templates
Step 3: Paste PrintFriendly Button Code.
- Find <data:post.body/> in the Editor window.
* Tip: Press "Control" and "F" on keyboard to search. - Paste the PrintFriendly button code above <data:post.body/> to make the button appear above your posts. Paste the code below <data:post.body/> to place the button below your posts.
* Careful: There's two versions of <data:post.body/>. Use the first (web) not the second (mobile).
Step 4: Preview and save your changes.
- Click Preview.
- Click Save template.


0 comments:
Post a Comment